Miku 3rd gen workflow in Blender 2.8 beta
/UPDATE 2021: A lot of new options have come since this post was made, but much of it still applies. Eevee has replaced ToonKit in the workflow, and there’s been more work on hair. See newer posts and YouTube tutorials.
It’s been awhile since I updated, but I’ve been working away behind the scenes and posting the results on my Facebook and Twitter (which you should really follow.) I keep meaning to do a big batch of updates once I complete a good character workflow, but I have not been able to keep up with the pace of change within Blender (blame my day job). But now that 2.8 is nearing it’s full release, it’s time to start talking about what an NPR workflow can look like with all the new tools and features.
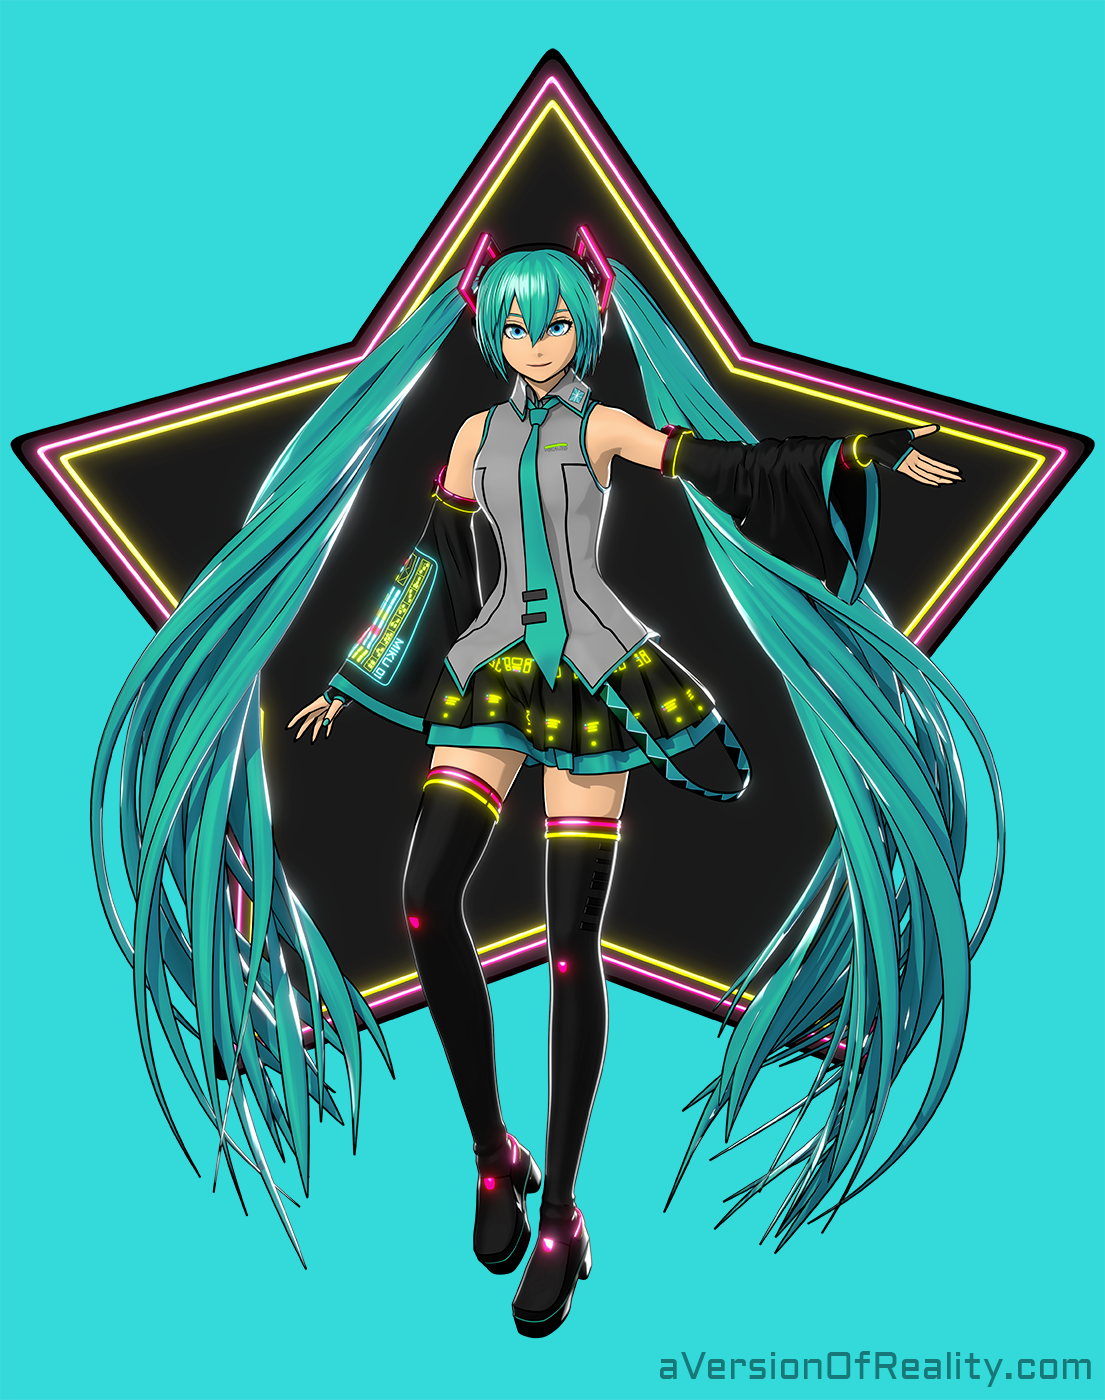
Entry for the 2019 Miku Expo fan art contest by ForFansByFans.com. Click for full size. Also on ArtStation, DeviantArt, Pixiv.
In the last couple of years, we’ve gotten:
The cycles Denoiser, a total game changer for render times.
Cycles ToonKit OSL nodes, another total game changer for our Toon rendering options.
Cycles Bevel and Ambient Occlusion nodes.
Blender 2.8’s cloth sim update and the Surface Deform modifier, allowing for proper cloth and posing.
EEVEE realtime render engine, which I’m currently not that interested in as it lacks a proper Toon node, but it has other NPR options. Excited to see where it goes. (Update 2019: Its now usable due to Shader to RGB node.)
Animation Nodes addon lets us automate all sorts of stuff we couldn’t before.
Countless other small updates and optimizations that generally make our lives as artists easier.
(And coming soon, the new LANPR line art render engine, a new override system, and much more.)
So with that in mind, its time to do a big overview of my current workflow. The addons, techniques, elements, etc. As always, my goal is an efficient, reproducible style that lets me mass produce high quality characters without driving myself insane. My project lately has been another version of Miku that has gone through several iterations as I slowly make upgrades, and will no doubt go through many more. But here’s what I’m using right now.
The Shader:
ToonKit uses OSL (Open Shading Language) based nodes. It’s still Cycles, but it uses custom nodes that calculate shading as a Color, instead of a Shader (Yellow output socket instead of Green.) Regular Cycles shaders have the restriction that you can only mix shaders with other shaders. You cannot use the output of one shader to mix colors, or as an input for another shader. What this ends up meaning in practice is that we cannot break realism very much. We can’t tell a material to be blue in the bright areas and orange in shadows, because we have no way to access the shading output within the material itself. This is because Cycles doesn’t calculate the shading until you actually start rendering. That’s the price we pay for realistic light (that and render speed!)
ToonKit calculates light in an unrealistic way. It’s much faster, and it does it as a color output. So we can do whatever we want with it! But there’s no bounce light. And we have to render everything using Emission nodes because the render is essentially shadeless, but colored dark in areas that light can’t get to. So that also means no Passes in the compositor. And we can only render with CPU, as OSL does not run on GPU. That slows the render speed down a lot. But it doesn’t really matter because ToonKit only needs about 32 samples to be clean (especially with the denoiser), whereas a regular GPU based shader setup will need ~250+ even with the denoiser.
I’m not going to post my current shader node setup as it’s still evolving (and its a total mess right now), but I’ll share the basic structure of the shader I used for the Neon Star Miku piece:
3 Types of Diffuse Shading:
Hard cel shading from the ToonKit EasyToon node. Everything has this.
Soft shading from the new Cycles Ambient Occlusion node. The hair has less of this.
More soft shading from a second EasyToon node (not cel shading.) The amount of this is controlled per object. The cloth has a lot, the hardsurface plastic hardly any. This gives the effect of soft shading that currently hits a hard edge where 1) starts.
2 Types of Gloss Shading:
A very rough, soft specular mixed with the diffuse based on Fresnel. Due to different IORs on different materials, it gives very soft shading on cloth, and still gives fairly hard highlights on the shiny plastic bits.
A very hard, bright Rim Light boost effect. This is a very big white Specular shader gated by facing via the ToonKit Rim node (same can be done with layer weight and a color ramp.) So it only appears at glancing angles that are illuminated by the back lights. This is then just added to the rest of the shader, blowing it to bright white. This exaggerated Rim Light is necessary to still have visible Rim Light after Line Art has been layered over it.
The darkness of the shading is controlled via the ToonKit world color (new in 1.3), similar to regular World ambient lighting in Cycles. The scene is very high key, with the darkest shading having a Value of 0.6. There are areas where there are darker colors, but the shading itself doesn’t darken very much. There are also color shifts based on the shading. Most notably the green hair and cloth shifts towards blue in the shadows, and towards yellow in areas with soft specular.
Line Art:
For this project I stuck with Freestyle because it was already setup and there was a contest deadline, but ended up regretting it and spending hours fixing it by hand in Krita. I’m going to switch over to ToonKit lines in the future I think, but it’s not necessarily an obvious choice because both have pros and cons. So lets go over some of the ones that I care about for this workflow:
Freestyle:
+ Detects lots of edge types.
+ Easy to have on its own layer (very important for compositing and being able to conveniently fix problems in post).
+ Lots of artistic effects through the various modifiers (thickness variation, simplification, etc).
- Lots of random stroke glitches, line breaks, and chaining problems that need complex setups to mitigate and are never totally solved.
- Complex and clunky UI setup if you want different settings for different objects, material based effects, etc. Needs drivers if you want to do something like conveniently change all your line sizes without clicking through a ton of tabs and dropdowns.
- Very difficult to make a dynamic setup that stays consistent relative to the character at different camera distances or even resolutions. Most effects will need very different settings at different levels of zoom. You end up having to hand edit tons of parameters for different shots.
Overall Freestyle is complete and will do what you need to do, but it can be a very poor artistic experience.
ToonKit Lines:
+ Generated in the material itself, so easily colored, distorted with textures, masked, viewport previewed, etc.
+ Clean and consistent. No random breaks, chaining issues, artifacts, etc.
+ Can be made into a node group that allows for different settings per object, or a single material can be put as a layer override, or global settings can be used to control the settings across many materials.
+ Comes with a setting to have Dynamic size right out of the box (Relative).
+ Good control of normal based lines, so easier to pick up cloth wrinkles, crevices, etc.
+ Normal based lines will pick up mesh intersections.
- Cannot render marked edges at all. It can pick up internal lines based on face angle, but you cannot mark an edge to get a line like you can in Freestyle. This is due to technical limits in OSL. Internal lines need to come from another source.
- Lines are colors in your material, so they exist only where there is something to be colored. On an internal edge, you’ll get lines on both sides of the edge. On an external edge, it can’t draw the line outside the shape, so it only goes inside. This makes external lines half as thick as internal. Freestyle is a post process, so it does draw external lines on edges, with half the line covering the model and half going over the background. You can make the external toonkit lines twice as thick to be consistent with the internal lines, but then they are going to cover more of your model and do things like kill your Rim Lighting as mentioned above.
- Harder to get as its own Render Layer/Pass, unless you are using a full Render Layer override material, in which case you end up with the same settings on all your objects. (This may change soon though as ToonKit is adding a custom Passes system, Blender 2.8 is soon getting a new override system, and there’s some talk of getting access to Custom Properties via the Cycles Attribute node.)
So what to use overall? ToonKit is really nice for what it does, but needs to be coupled with another method of getting internal marked lines, and perhaps external contours as well. You could use both ToonKit and Freestyle together. Since you’d only use Freestyle for Marked Edges and External Contours, you’ll run into a lot less problems than trying to do everything with it. You could also paint/bake your internal lines on textures, use other material lines based on Bevel or Pointiness, or make them out of curves/geometry and Surface Deform them to the object. (I’m also looking at more advanced methods of making geometry based lines, but its really complicated.) And we have the new LANPR line art engine still being developed too. For now, I’ll be mixing ToonKit and simple Freestyle.
Cloth:
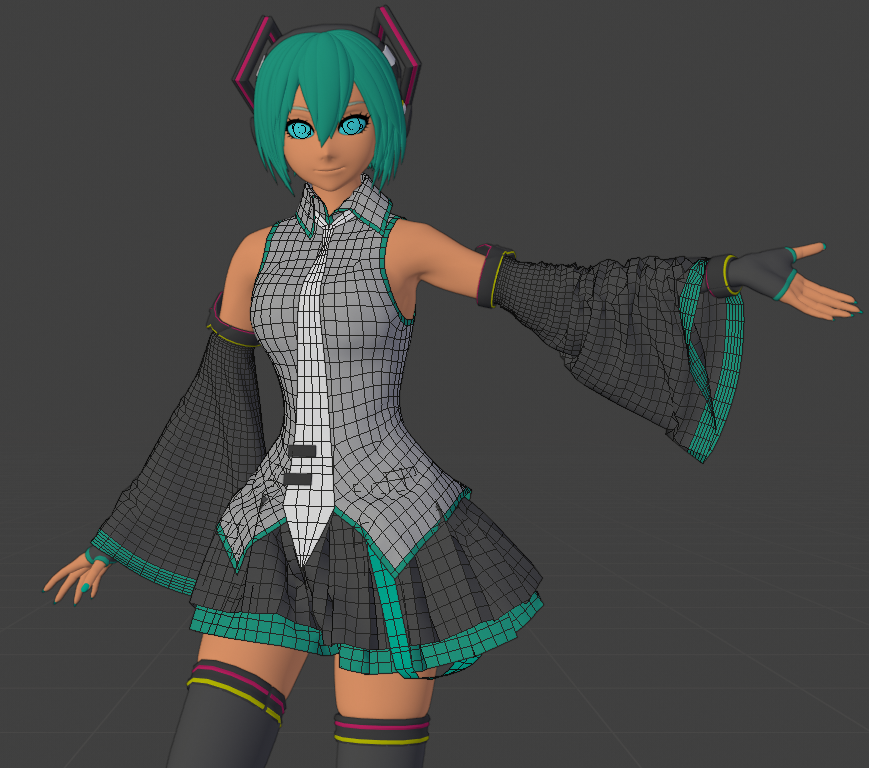
Simmed meshes without Solidify and Subsurf modifiers. Click for full size.
The 2.8 updates to cloth simulation are some of the biggest time savers we’ve gotten. Blender’s old cloth system just didn’t work very well. It was slow and unreliable. If you used very simple, optimized meshes it could work. But there was no good way to transfer motion from those meshes to more complex detailed meshes. Now there is thanks to the new Surface Deform modifier. It’s not perfect and can give binding artifacts if your meshes are too different, but it’s a huge improvement. (You have always been able to use Mesh Deform Modifier, but this requires you to solidify+displace your cloth sim object to make a cage around your detailed object. This only works for simple garments and can be inaccurate.)
I’ve been using Marvelous Designer to make and simulate my cloth for years. It’s a great program, but it introduces lots of annoying workflow issues. Its cloth simulation is very fast and it can handle complex clothing, but the whole process of importing an avatar’s motion into MD and then the cloth simulation back into Blender gets tedious. The big restriction is that you have to maintain the mesh’s vertex order. You cannot move or edit a single vertex in Blender or the garments will no longer sync up, and you can’t import the animation from MD. We can’t retopologize for shading, remove unnecessary complexity, tweak the shape, or anything. For most garments you can get away with pinning a bunch of it and rigging it normally, so it’s just inefficient and annoying. Surface Deform alone is a big improvement in this area because we can bind an edited mesh to a MD sim mesh, but this only really works on single layer garments.
The new 2.8 cloth is fast and stable enough that it’s no longer necessary to import animation from MD. My workflow now is to build complex clothing in MD, export to Blender, retopologize, and then do all the posing and cloth sim inside Blender. Much better! I can sim a character into a pose over 30 frames, then allow another 30 frames to rest, and it only takes a couple of minutes to bake, even with multiple layered cloth objects (using a 3.4ghz processor.) And for those who don’t want to learn MD or pay for it, there’s starting to be more options inside Blender for a similar workflow.
Cloth setup for this project:
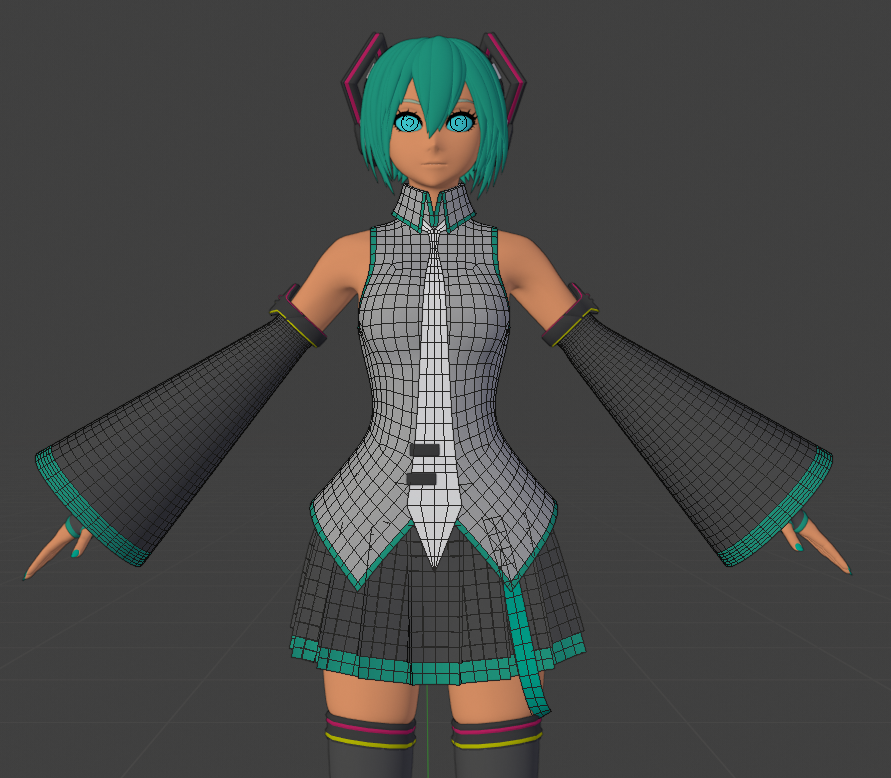
Base topology before the simulation. Click for full size.
The topology came from Marvelous Designer, so it started out with strange loop flow, but has consistent vertex density. I retopologized some of it, but didn’t bother with all of it because it’s not necessary. Pictured are the sim meshes for the shirt and tie. They have more detailed meshes bound to them with the Surface Deform modifier. The sleeves, skirt, and belt didn’t need this because they have no surface geometry detail. They also have solidify and subsurf modifiers after the cloth sim, but those are disabled to show the mesh.
The cloth all has roughly the same settings. It varies a bit in the amount of Stiffness and Damping, but that’s about it. What’s important is the collision setup. I wanted to avoid any unnecessary problems, so I used some collision groups, and a hidden collision mesh for the collar. Here’s the setup:

It was necessary to have the raised arm bend and then straighten out to pull the sleeve back from the bracelet.
The Skirt is a collision object, and is in a collision group with the Body and Boots. So it ignores the shirt, tie, belt, etc.
The Belt will collide with the objects in the Skirt’s collision group. So it will collide with the skirt, but the skirt won’t collide with it. The belt itself is a collision object too.
The Shirt is a collision object, and is not restricted to a collision group. So it will collide off the belt, but the belt doesn’t collide with it.
The Tie and Sleeves are not restricted, but also are not collision objects. So they’ll collide off any of the other objects, but nothing can be influenced by them.
There’s also 2 wind force fields. One effects the Tie and sleeves, the other the shirt and skirt. They are at slightly different angles because the angle that gave me the amount of billow I wanted on the skirt would plaster the tie against the shirt, and blow the sleeves back too much. It’s not realistic but it worked for this shot.
Under the collar is a hidden duplicate of the part of the tie that goes around the neck. On the tie sim mesh this area is pinned. The collider is there to stop the collar from collapsing. High stiffness alone is not enough. The pinned section of the tie and collider is on an armature. None of the actual shirt is pinned. It was necessary to do it this way to avoid the main part of the tie being a collider and influencing the shirt.
General cloth advice:

My Skirt settings. This is a good baseline to start from if you’re not sure what to use. Note that some of these parameter names may change before the full release of 2.8.
There’s a lot that can go wrong with cloth settings, and I’m already getting lots of questions on how to make it all work. The method is about the same as it was in the past, so old cloth tutorials still apply (some parameter names have changed, and it’ll all work better now.) Here’s some general rules of thumb to have things not totally explode:
Make sure cloth objects don’t have thickness/volume/non-manifold geometry, and have evenly spread vertices.
If you have volume, you need to make a copy without volume to be the sim mesh and attach the detailed version with Surface Deform modifier.
Make sure no unpinned vertices are intersecting with any collision meshes, and that parts of your mesh aren’t self-intersecting either (if using self collision.) If it seems impossible for a real garment to do, it probably won’t work.
The default collision distance is .02. This is way too high if you are working at the usual scale of 1 Blender Unit = 1 meter. Set it to be .001 on the collision object and in the cloth collision settings. You can turn it up more from there if you need more padding.
Quality steps should be at least 20 to start. Once its working you could turn it down if you want to sacrifice quality for speed. Collision quality you can get away with lower amounts, but it does influence the character of the fabric.
Don’t turn on self collision until your sim is working without it.
Shear/Binding stiffness should generally be lower than Tension/Compression.
Damping shouldn’t be higher than stiffness, especially for Shear/Bending.
If you have pinned areas controlled by an armature or mesh deform, make sure you set vertex groups on those deformers to prevent them from influencing the rest of the mesh. Otherwise you will get additive movement of the rig and cloth sim.
I use 30 frames to get into pose and 30 to rest. More than this shouldn’t really be necessary for just posing.
Collision objects and forcefields will influence the simulation even if they are hidden in the viewport. You need to disable the collision or forcefield entirely in the physics tab. Alternatively, forcefield influence can be set to 0 in the cloth sim’s Field Weights tab.
Hair:
Getting anime/toon hair that looks good in 3D is always a huge struggle. 3D can do realistic particle hair conveniently, but that won’t work for most NPR styles. Toon hair tends to be very low detail and stylized. We have to deal with the paradox that the geometry that gives us the right sort of shading will often have the wrong silhouette. And then we also need to have our hair be riggable! I won’t claim to have fully solved this problem, but with the right topology and shading we can avoid most of the worst problems. For this project I got it good enough that I only had to do a little bit of cleanup in post.
The bangs were modeled with curves, and then converted to mesh and joined together at the edges of the strands.


Knee correctives. (https://www.youtube.com/watch?v=VjCUwd93VYE 7)
The twin tails are modeled as vertical cylinders, then spread out and twisted with an armature and Simple Deform - Twist modifiers (driven by bones on the armature via drivers.) Then its attached to a curve via Curve modifier for actual posing. This setup keeps it easy to avoid terrible intersections by keeping everything mostly parallel. And it’s a lot easier to build than a full armature setup that would produce similar results.
The hair shader uses a lot of the Bevel Node to smooth together edges, minimize intersections, and generally avoid bad shading.
Rigging:
The body is rigged with the Auto Rig Pro 7 addon, although I’m not really using most of the ‘pro’ features. Rigify would have worked too. I added a lot of corrective bones based on DanPro’s excellent tutorials, especially this one and this other one.
Some more WIP pics:


A follow up outfit that I didn’t get around to finishing:


