How To Use The Cybergirl
/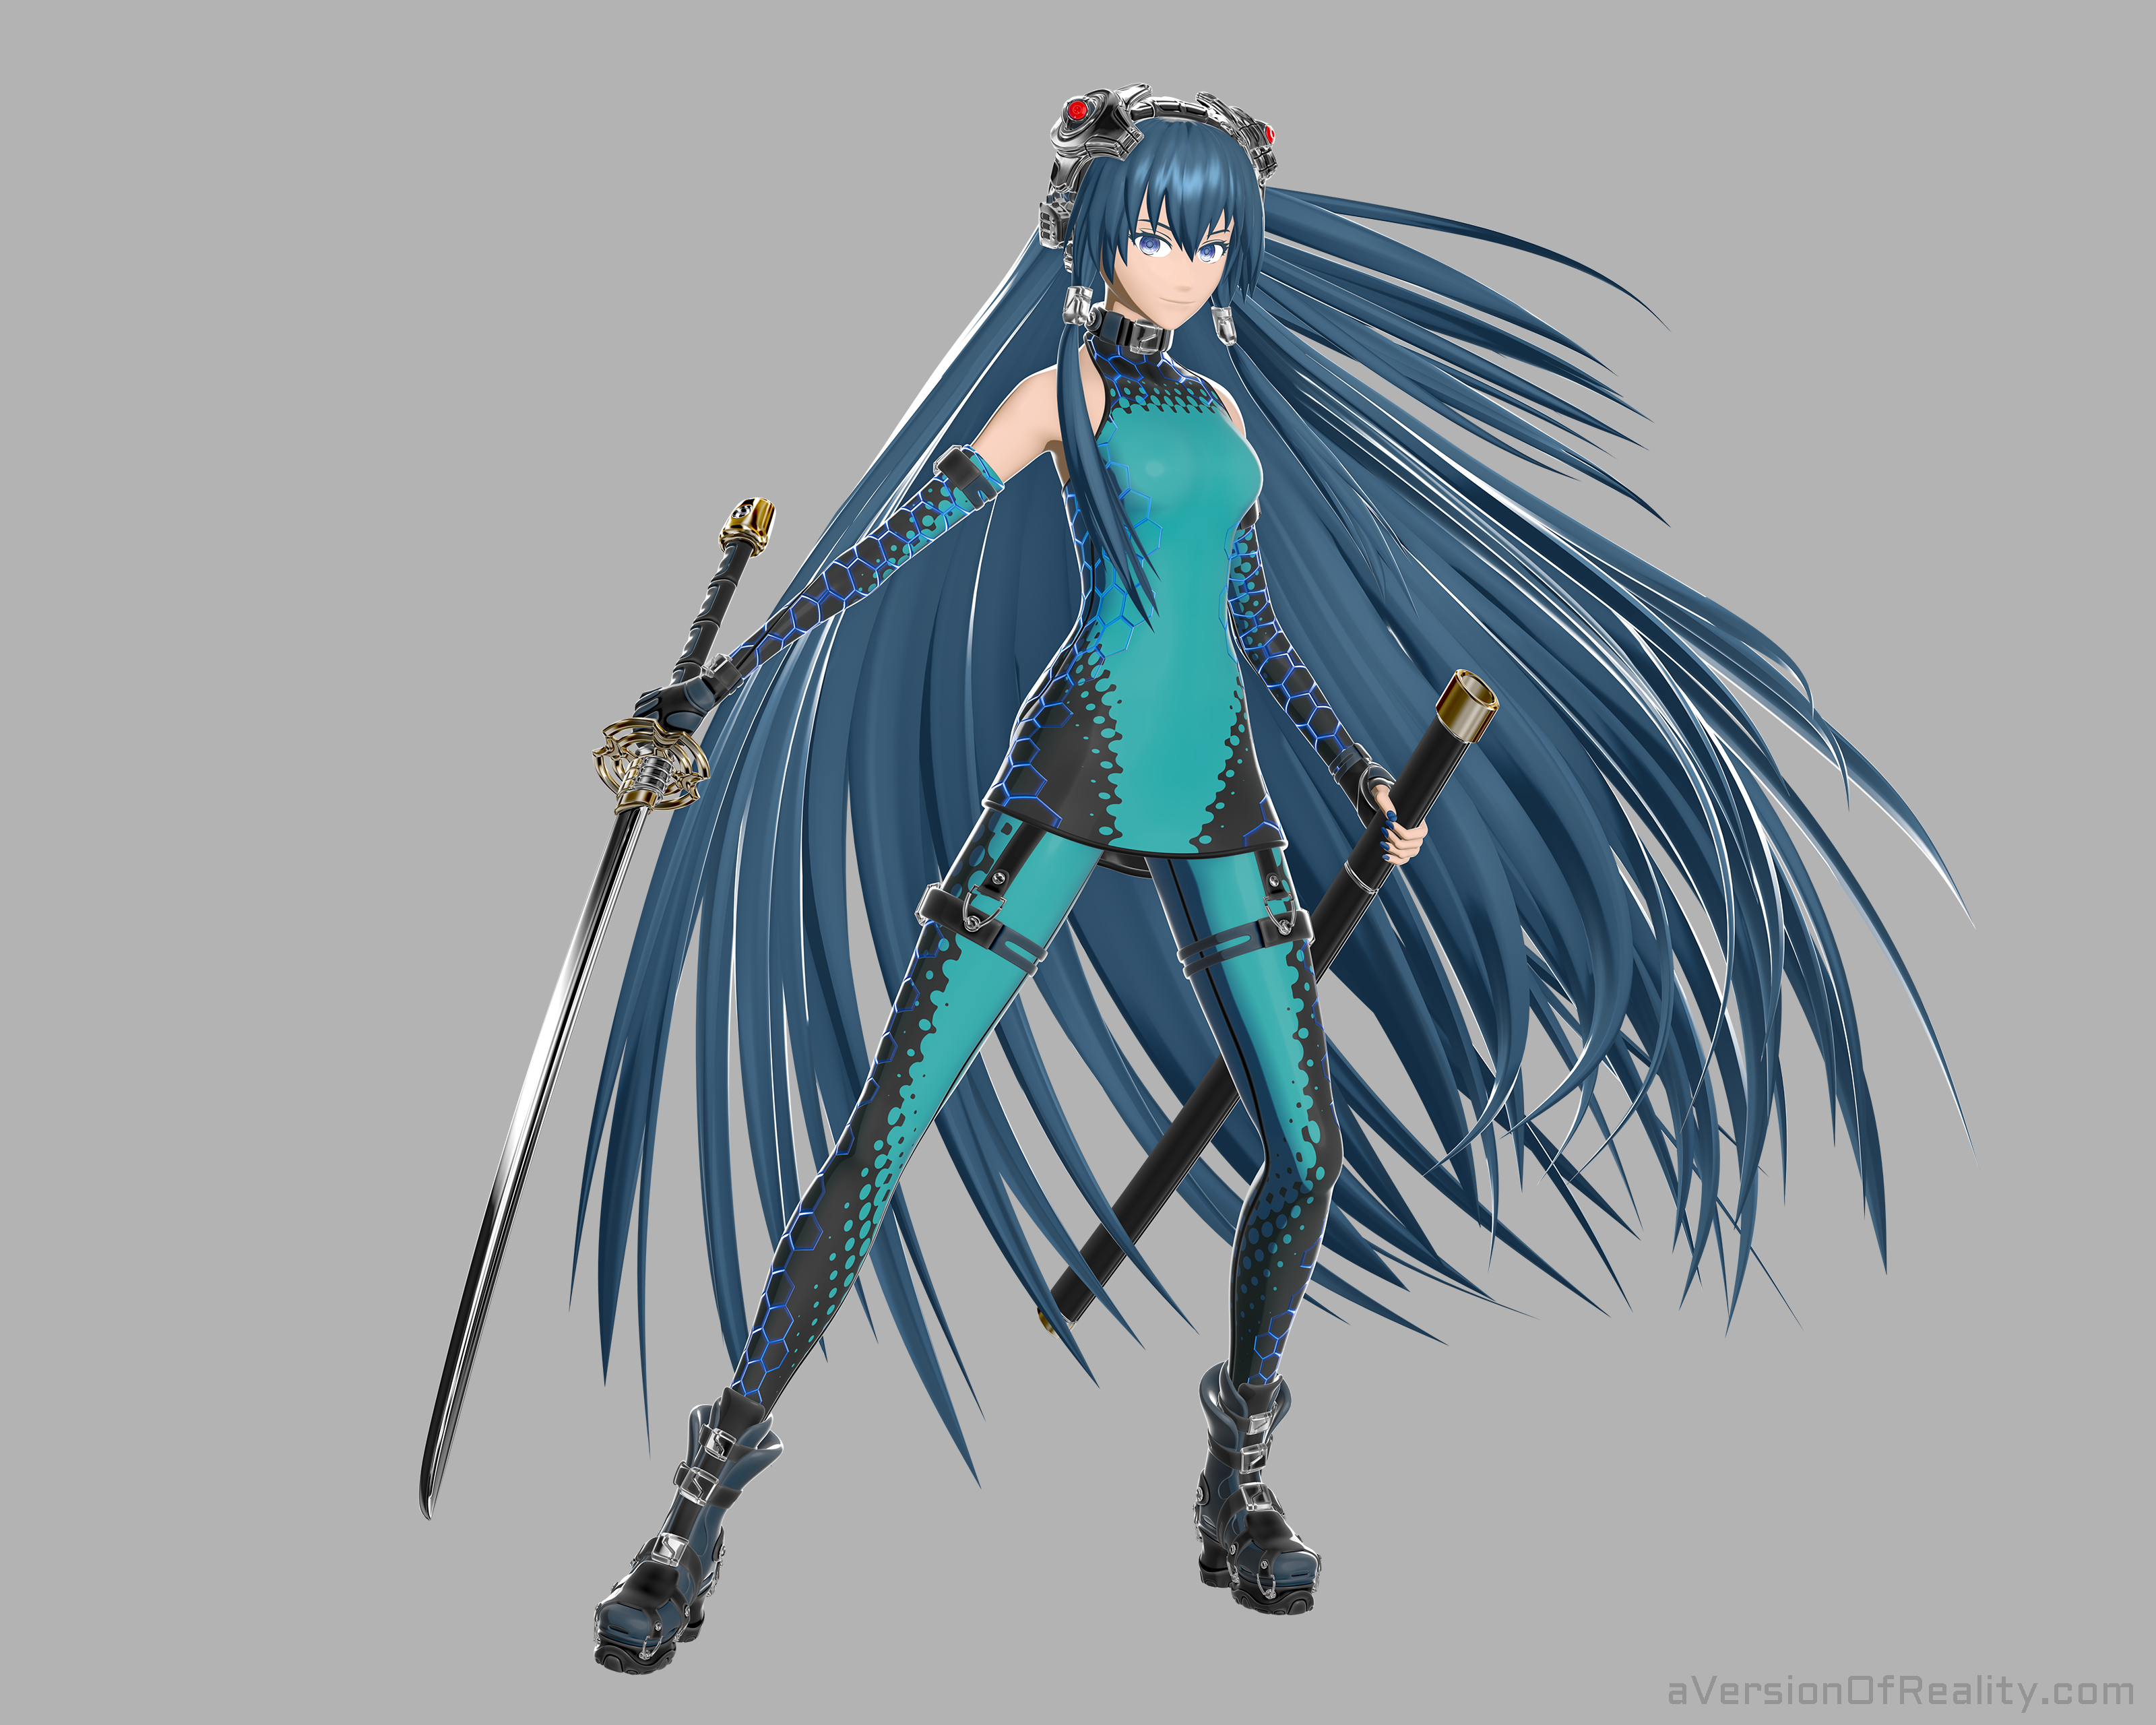
Out of the box render with no post work or line art. Click for full size.
This article is about how to use the Cybergirl, my first character model release. It is being released as part of a BlenderNPR.org fundraiser for the Blender Extended Expressive Renderer (BEER) project. You can get the the file on Gumroad here.
The Cybergirl is a reskin of my Reimu project with a bunch of my recent experiments added. She’s got Projected Texture Eyes, Stretchy Skirt Rig, and lots of Fake Toon Metallics. Everything else is the same as Reimu, so read that article or watch that video for the details.
Note that both of these characters were experiments in pushing an Eevee illustration workflow as far as I could. The Cybergirl is a bunch of experiments and tests being released for educational purposes, not a production ready model. It was made with a 2D illustration workflow in mind, not animation or game engine export. It looks good, but Eevee compiles very slowly, and there are various issues in other areas. I’ll note the worst of these limitations in this post, and will hopefully find solutions to them in future projects.
The file was made with Blender 2.93.
Using the Rigs:
Corrective Bone Layer
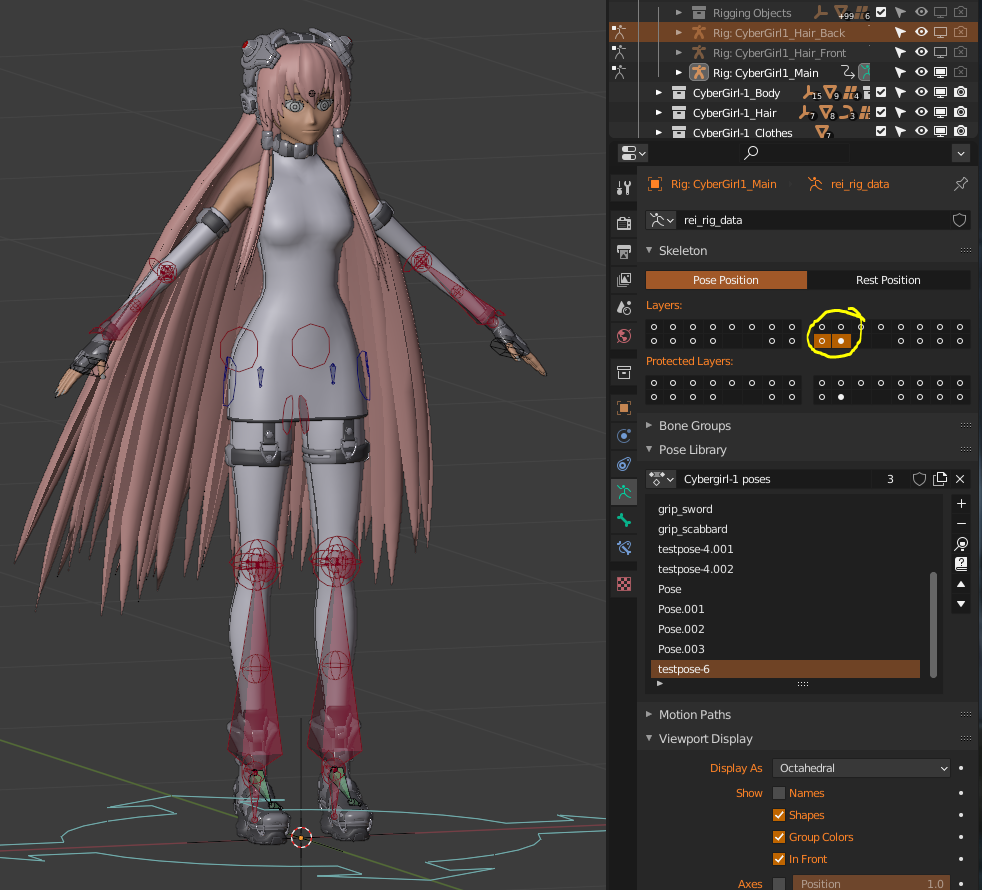
The body, short hair, and long hair are split into separate rigs to avoid confusion. You can put all three rigs into pose mode at the same time, but note that when loading poses from the Pose Library, it only loads to the Active Object. So you need to select each in turn and load the pose again.
Posing the Body:
The body uses the Rigify rig. There’s nothing special about using it. I’ve added various corrective bones for the joints that can be found on bone tweak layers, or all on layer #24 and #25 (not all are in use on this model). These bones move automatically with the rig, but can also be manually adjusted for extreme poses. The skirt has some corrective bones on the leg layers for adjusting the height.
The Face Rig:
The face rigging is composed of BBone segments that behave like bezier curves. Most have handle controllers, parent bones where two segments meet, and a few bigger controllers like overall eye size. You can make expressions, or even major changes to the face’s proportions. Most of the face bones are on layer 2, with some lesser used ones on layer 3, and the deform bones on layer 19. Note that the original Rigify face bones still exist on layer 23, but are not used.
There are control bones in the eye controller for closing the eyes. This uses Action Constraints to move several bones and also change a shape key on the eyelashes.

The Props:
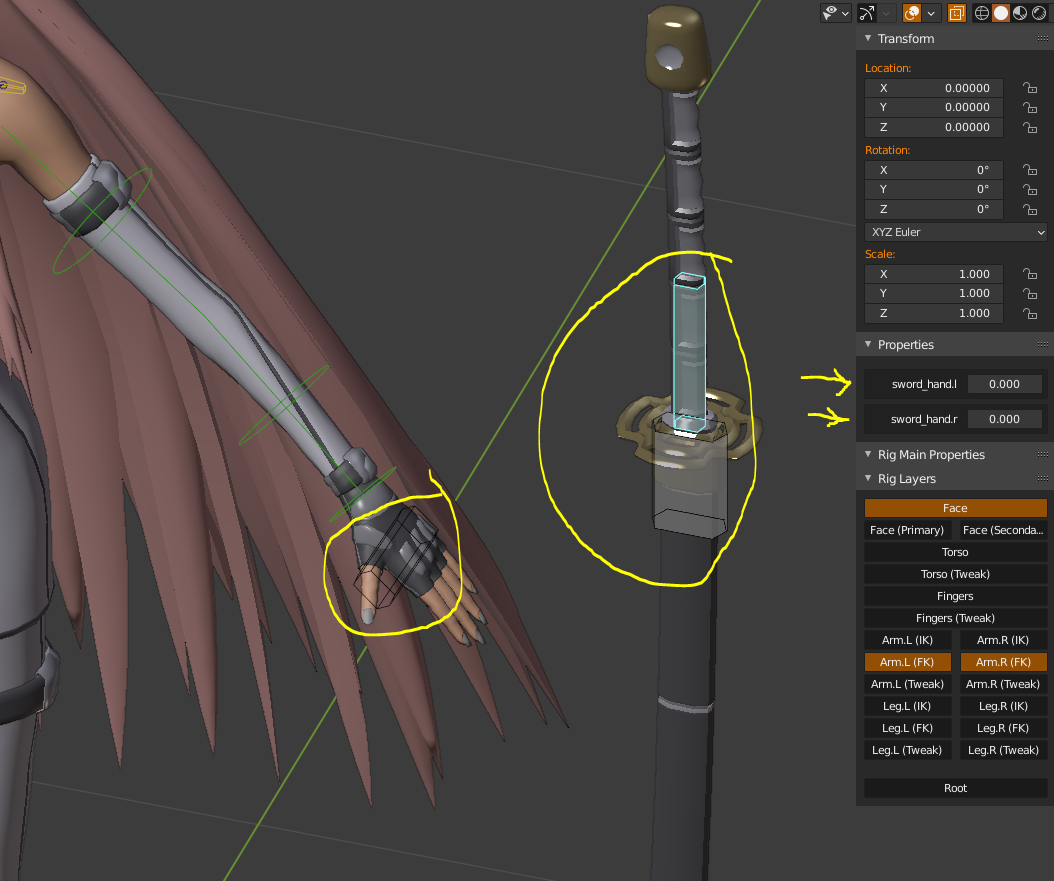
Prop bones and Properties
The Sword and Scabbard both have their own bones, and there are also prop bones attached to the hands. There are custom properties that snap the prop bone to the hand prop bone. You can snap each prop to either hand, and the scabbard to the sword. These properties show up in the Rigify N Panel.
Posing the Short Hair:
The Short Hair rig contains everything except the very long hair at the back. The bangs, ponytail, and front bundles were each rigged in a slightly different way while I was experimenting. They all use Bendy Bones and Drivers. The actual BBones are on Layer #2 and #3.
On the bangs and ponytail, there are control bones for the root and tips, and also some larger bones that control multiple strands. Note that due to some issues with BBone roll, there can be some unexpected twisting, especially in the ponytail. This can be fixed by rotating the tip bones on local Y, but may present problems if you attempt animation. (I did not design this rig with animation in mind, but I’d still like to solve this problem.
The side bundle main control bone at the tip has a Limit Distance Constraint that keeps it from stretching. This can be disabled if you want. The bone near the cheek controls the middle of the strand. There is a bone at the root of the strand, but its not really intended to be used.

Posing the Long Hair:

The Long Hair is the most ambitious experiment. It uses Bendy Bone strands controlling lattices, and has a bunch of modifiers. Since the initial version for Reimu, I’ve also added a Geometry Nodes setup that merges some edges of the bundles together and removes internal faces (Mask + Weld) based on the proximity of the bones at the edges. This doesn’t work perfectly, so if you make too complex of a pose it’ll break down. But you can always disable the Proximity Merge Geo nodes and modifiers.
Each Bundle has its own tip controllers: One for the whole bundle, and then one for each side of the lattice. These side bones work like Bezier Curves. And there’s a larger controller for each side. There’s a bunch more tweak bones and controls that are best explained by the GIFs.


Geometry nodes merging nearby points between bundles.
Note also that the long hair is non-destructively shaped and wrapped onto the head with a variety of lattices. You can disable all the modifiers and Shape Keys to get it back to the base shape and position. The various lattices can be adjusted to change the shape.
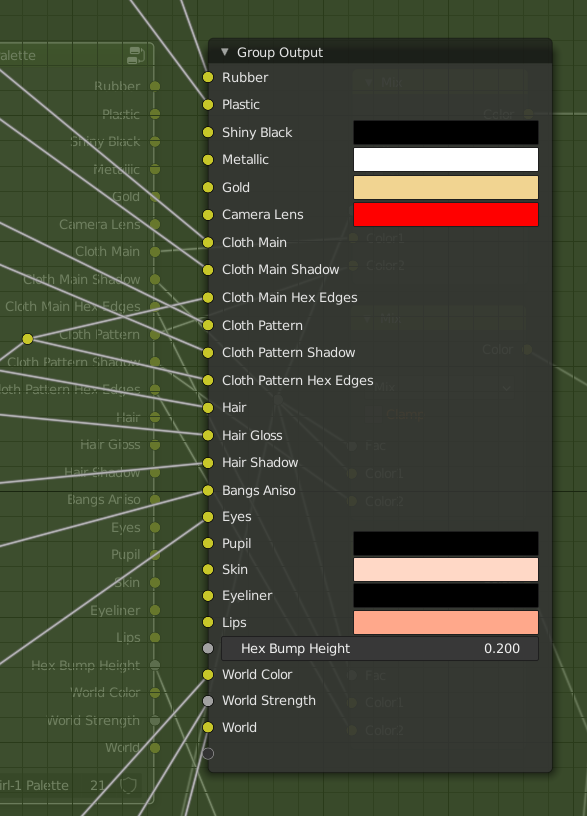
Materials and Rendering:
The Shader group is an updated version of the one from this tutorial. Every material uses the same group. The shader compile times are terrible, and it may be too heavy for low end hardware. Viewport performance is fine once compiled, but rig performance is poor while rendering. There is no simple way to improve this at this time. Subsurf makes rig performance while rendering even worse. Most objects have 1 level of viewport subsurf and 2 levels on render. Simplify with 0 viewport levels is enabled by default for the sake of viewport performance.
Lights:
The Key Light has shadows disabled because Eevee’s shadows don’t look very good (I render higher quality shadows out of Cycles for finalized shots). You can enable them on the light if you want. They are enabled by default on the two rim lights, otherwise they’ll highlight everything.
Procedural Textures:

Visible pixelization on the baked textures up close.
Color Palette Group
The clothing patterns are procedural textures. For the sake of compile times, these have been baked to textures. However, this doesn’t look very good up close due to the resolution. If you want to do a close up shot or alter the pattern or layout, you can plug the procedural textures back in instead of the baked texture node. Note also that Gloves, Dress, and Leggings each have their own separate patterns and materials.
The Color Palette Group:
All of the colors of the character can be changed from within this group, which is used in every material. This is also where you set the World Color. Note that many materials will further modify the colors set here, especially for Shadow color changes.
Baked Pointiness and Normal Bevel Textures:
Various cloth and hardsurface materials use baked Pointiness maps and Beveled Normals maps. These are baked to big atlas textures, and all contained within the same group.

Forehead Fake Anisotropy Texture
The anisotropic highlight on the bangs is a procedural texture that adjusts the color and shininess in that area. It can be adjusted with the ‘hair_aniso’ bone on layer 1 of the rig.
Lights and Shadows:
The Backlights are instances of the same object, so adjusting settings on one changes them both. They have shadows enabled so that they don’t rimlight every edge of the model.
The Key Light is a sun lamp. It has shadows disabled as Eevee’s shadows are very poor quality (although this is likely to improve in the future.) If you want nice shadows, render them out of Cycles and put them into the Material, as shown in this video.
Generated Face Normals:

Another major experiment is the face normals. Instead of trying to use Normal Transfer or Normal Editing, I’m testing out completely replacing the face’s normals with ones generated from Object based Procedural Textures. This produces very clean shading, but it doesn’t entirely work yet. If you rotate the sun lamp left or right, then it behaves. But if you move it up or down, you can get strange results.
This can be fixed by adjusting the ‘CTRL-face_light’ bone on Layer 2, right between the eyebrows. Try moving or scaling it until you get the shading you’re after.
You can just disable the fake normals entirely by unplugging them from the shader group (they’re in the Skin material.)
Also, they do not affect the nose. That can still end up with bad shading at some light angles.

Line Art Options:

Shell Line problems (old test color scheme.)
There are several options for generating Line Art already setup in the file. None of them work perfectly, as there is no line solution that really plays quite right with complex models at this time. My own workflow assumes fixing up lines by hand in the end. Any of these methods is fine for producing rough lines.
Inverted Hull/Shell Lines:
There is a Shell Lines collection (disabled by default.) This contains instanced duplicates of each object with Displace modifiers and the correct material to produce outlines. This method works, and is the only method that works in the viewport. But, due to the complexity of the model, it doesn’t look that great.
Freestyle:

The Freestyle setup is quite detailed, with several layers and modifiers used. Currently it gives the best visual results, but can take some adjusting at different resolutions. The base settings were designed for ~3000 x 2000. If you use something much different, you may want to adjust the Freestyle Line Size in Render Settings.
To avoid some chaining issues, some of the layers use a Minimum or Maximum stroke length. This is 20px by default, but may also need adjusting at different resolutions if the lines get blobby or wiggly. They are setup to be Driven by a custom property on the Scene (see image).
Freestyle is disabled by default. Enable it in Render Settings, and plug in the Alpha Over node in the compositor, as it renders out as its own pass.
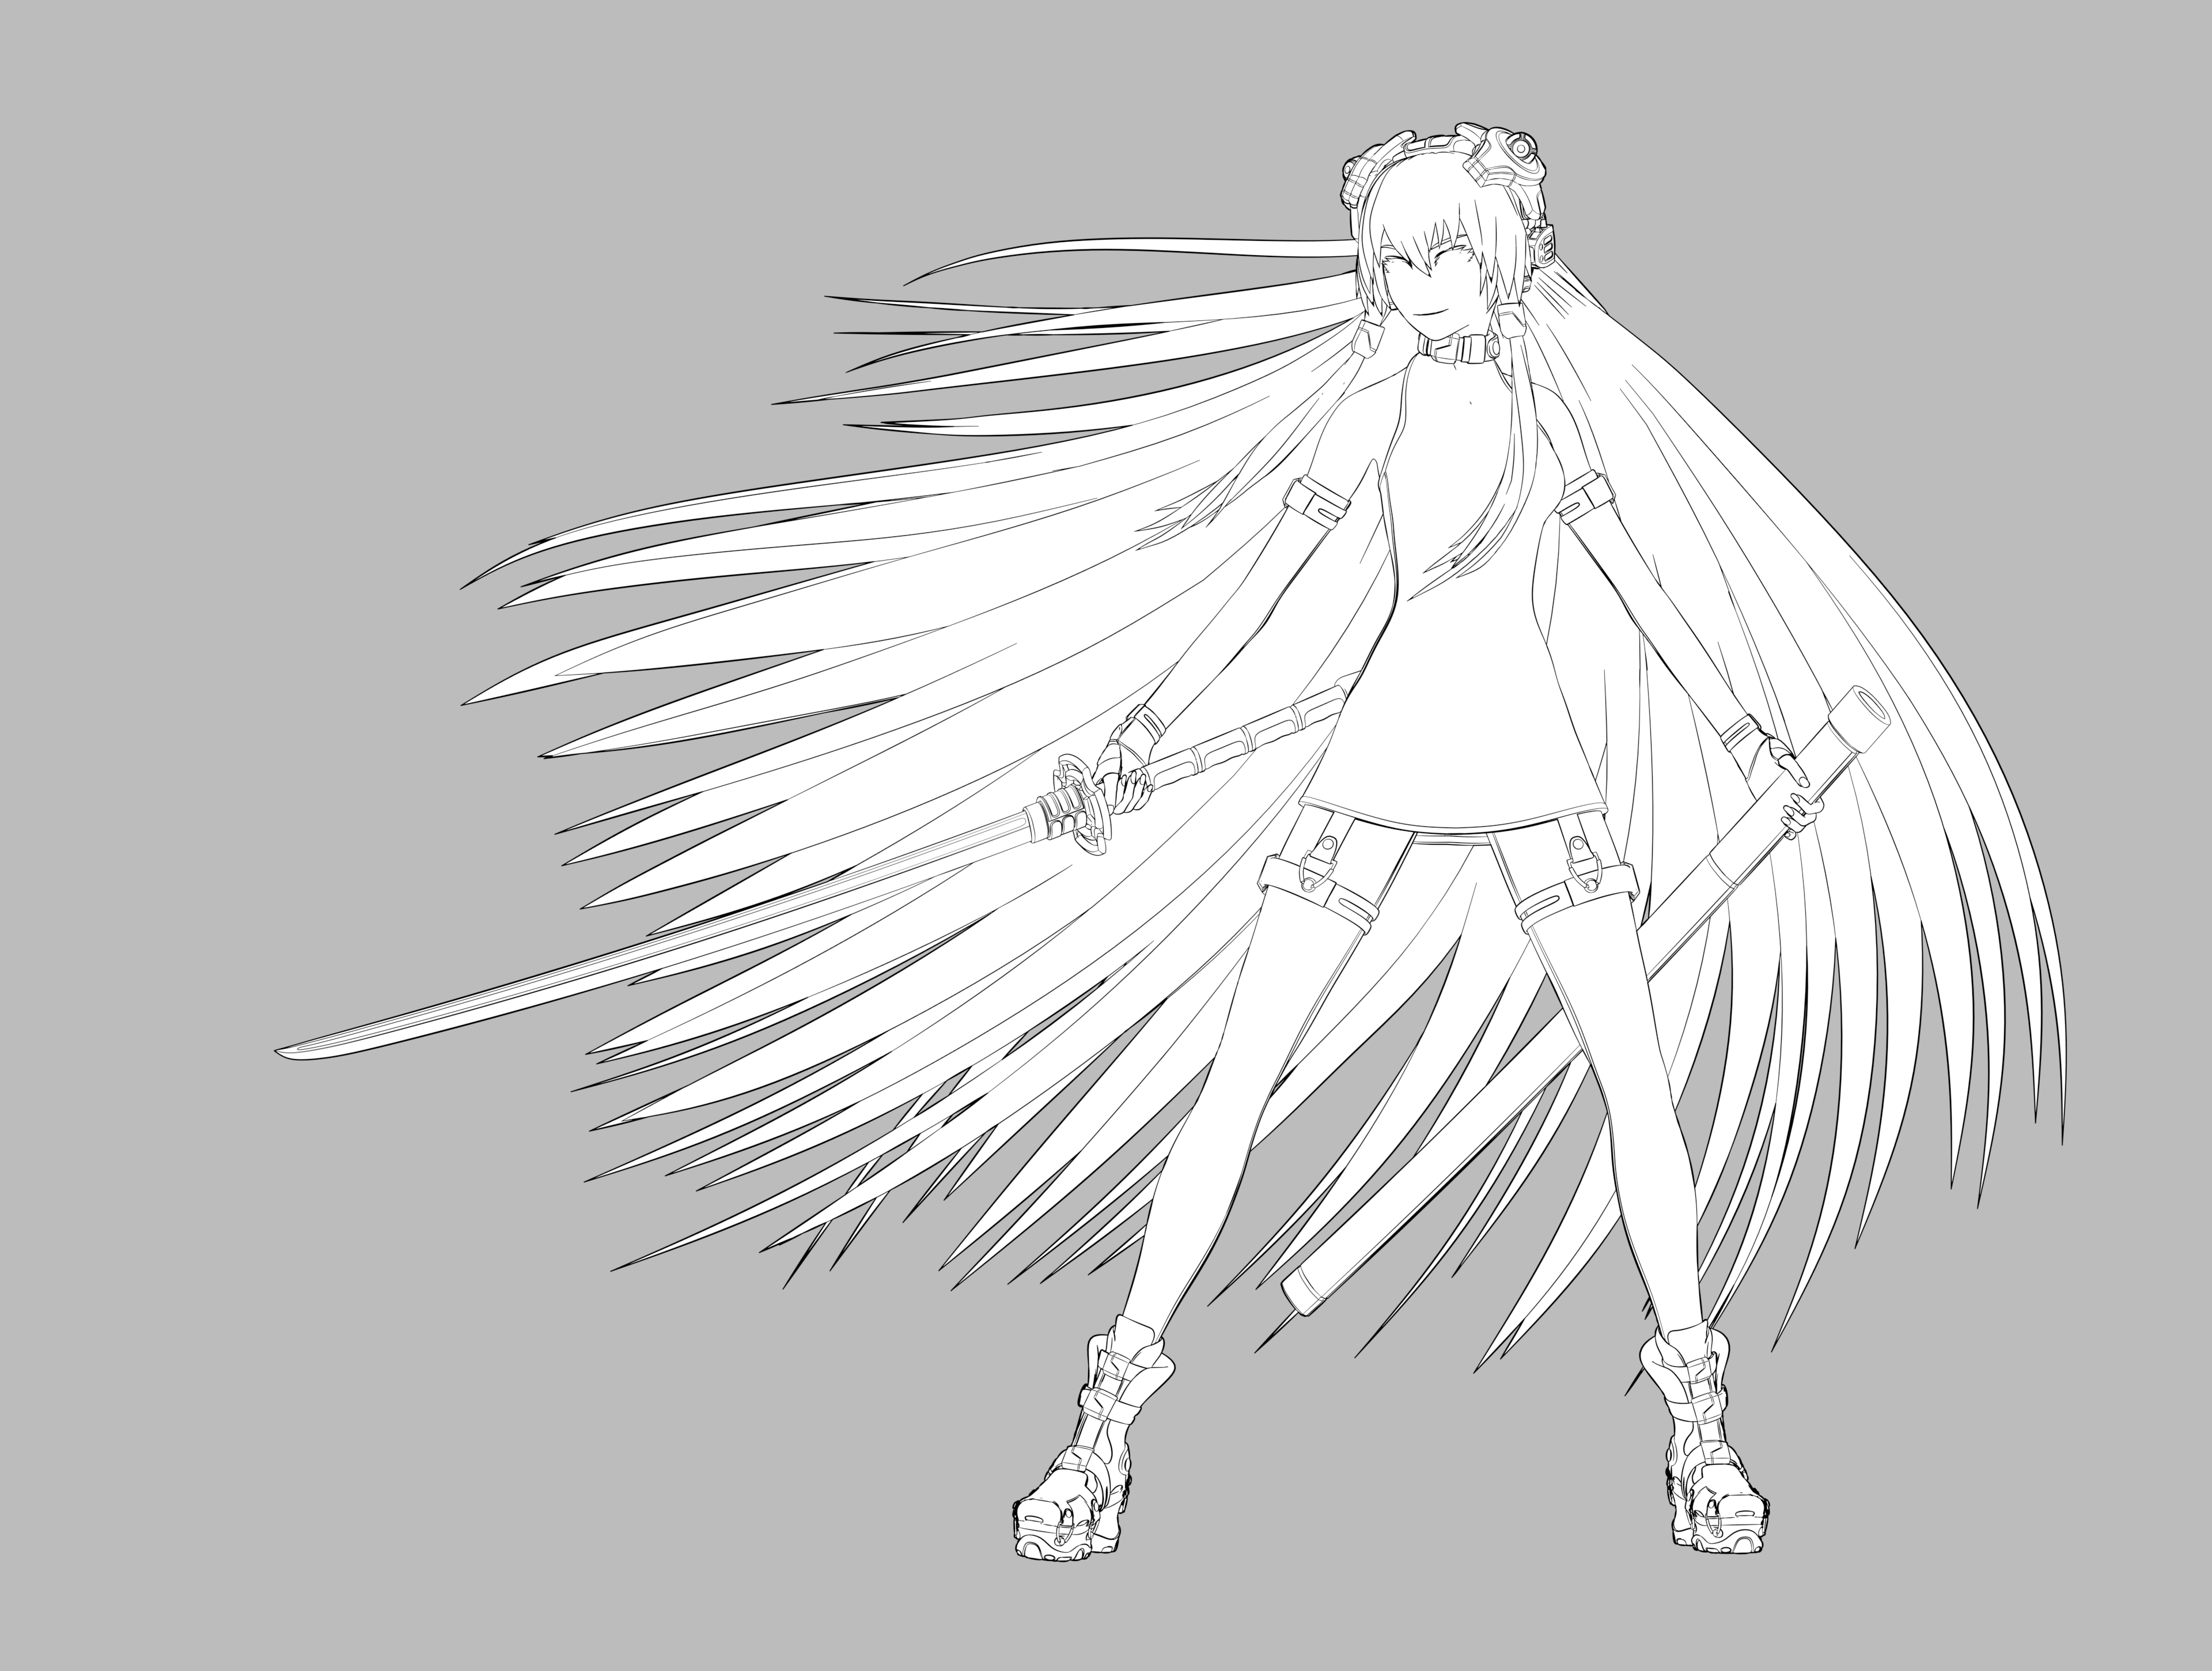
WIP Freestyle Line test. Click for full size.
Grease Pencil Line Art:
There is a collection with GP object setup for GP line art. To use it properly, you’ll want to duplicate the GP object to have a backup, pick your camera angle, enable full subsurf, enable the modifier, and then apply it. It’ll be pretty slow due to subsurf, and the results aren’t as good as Freestyle out of the box. But its fairly easy to clean up by hand.
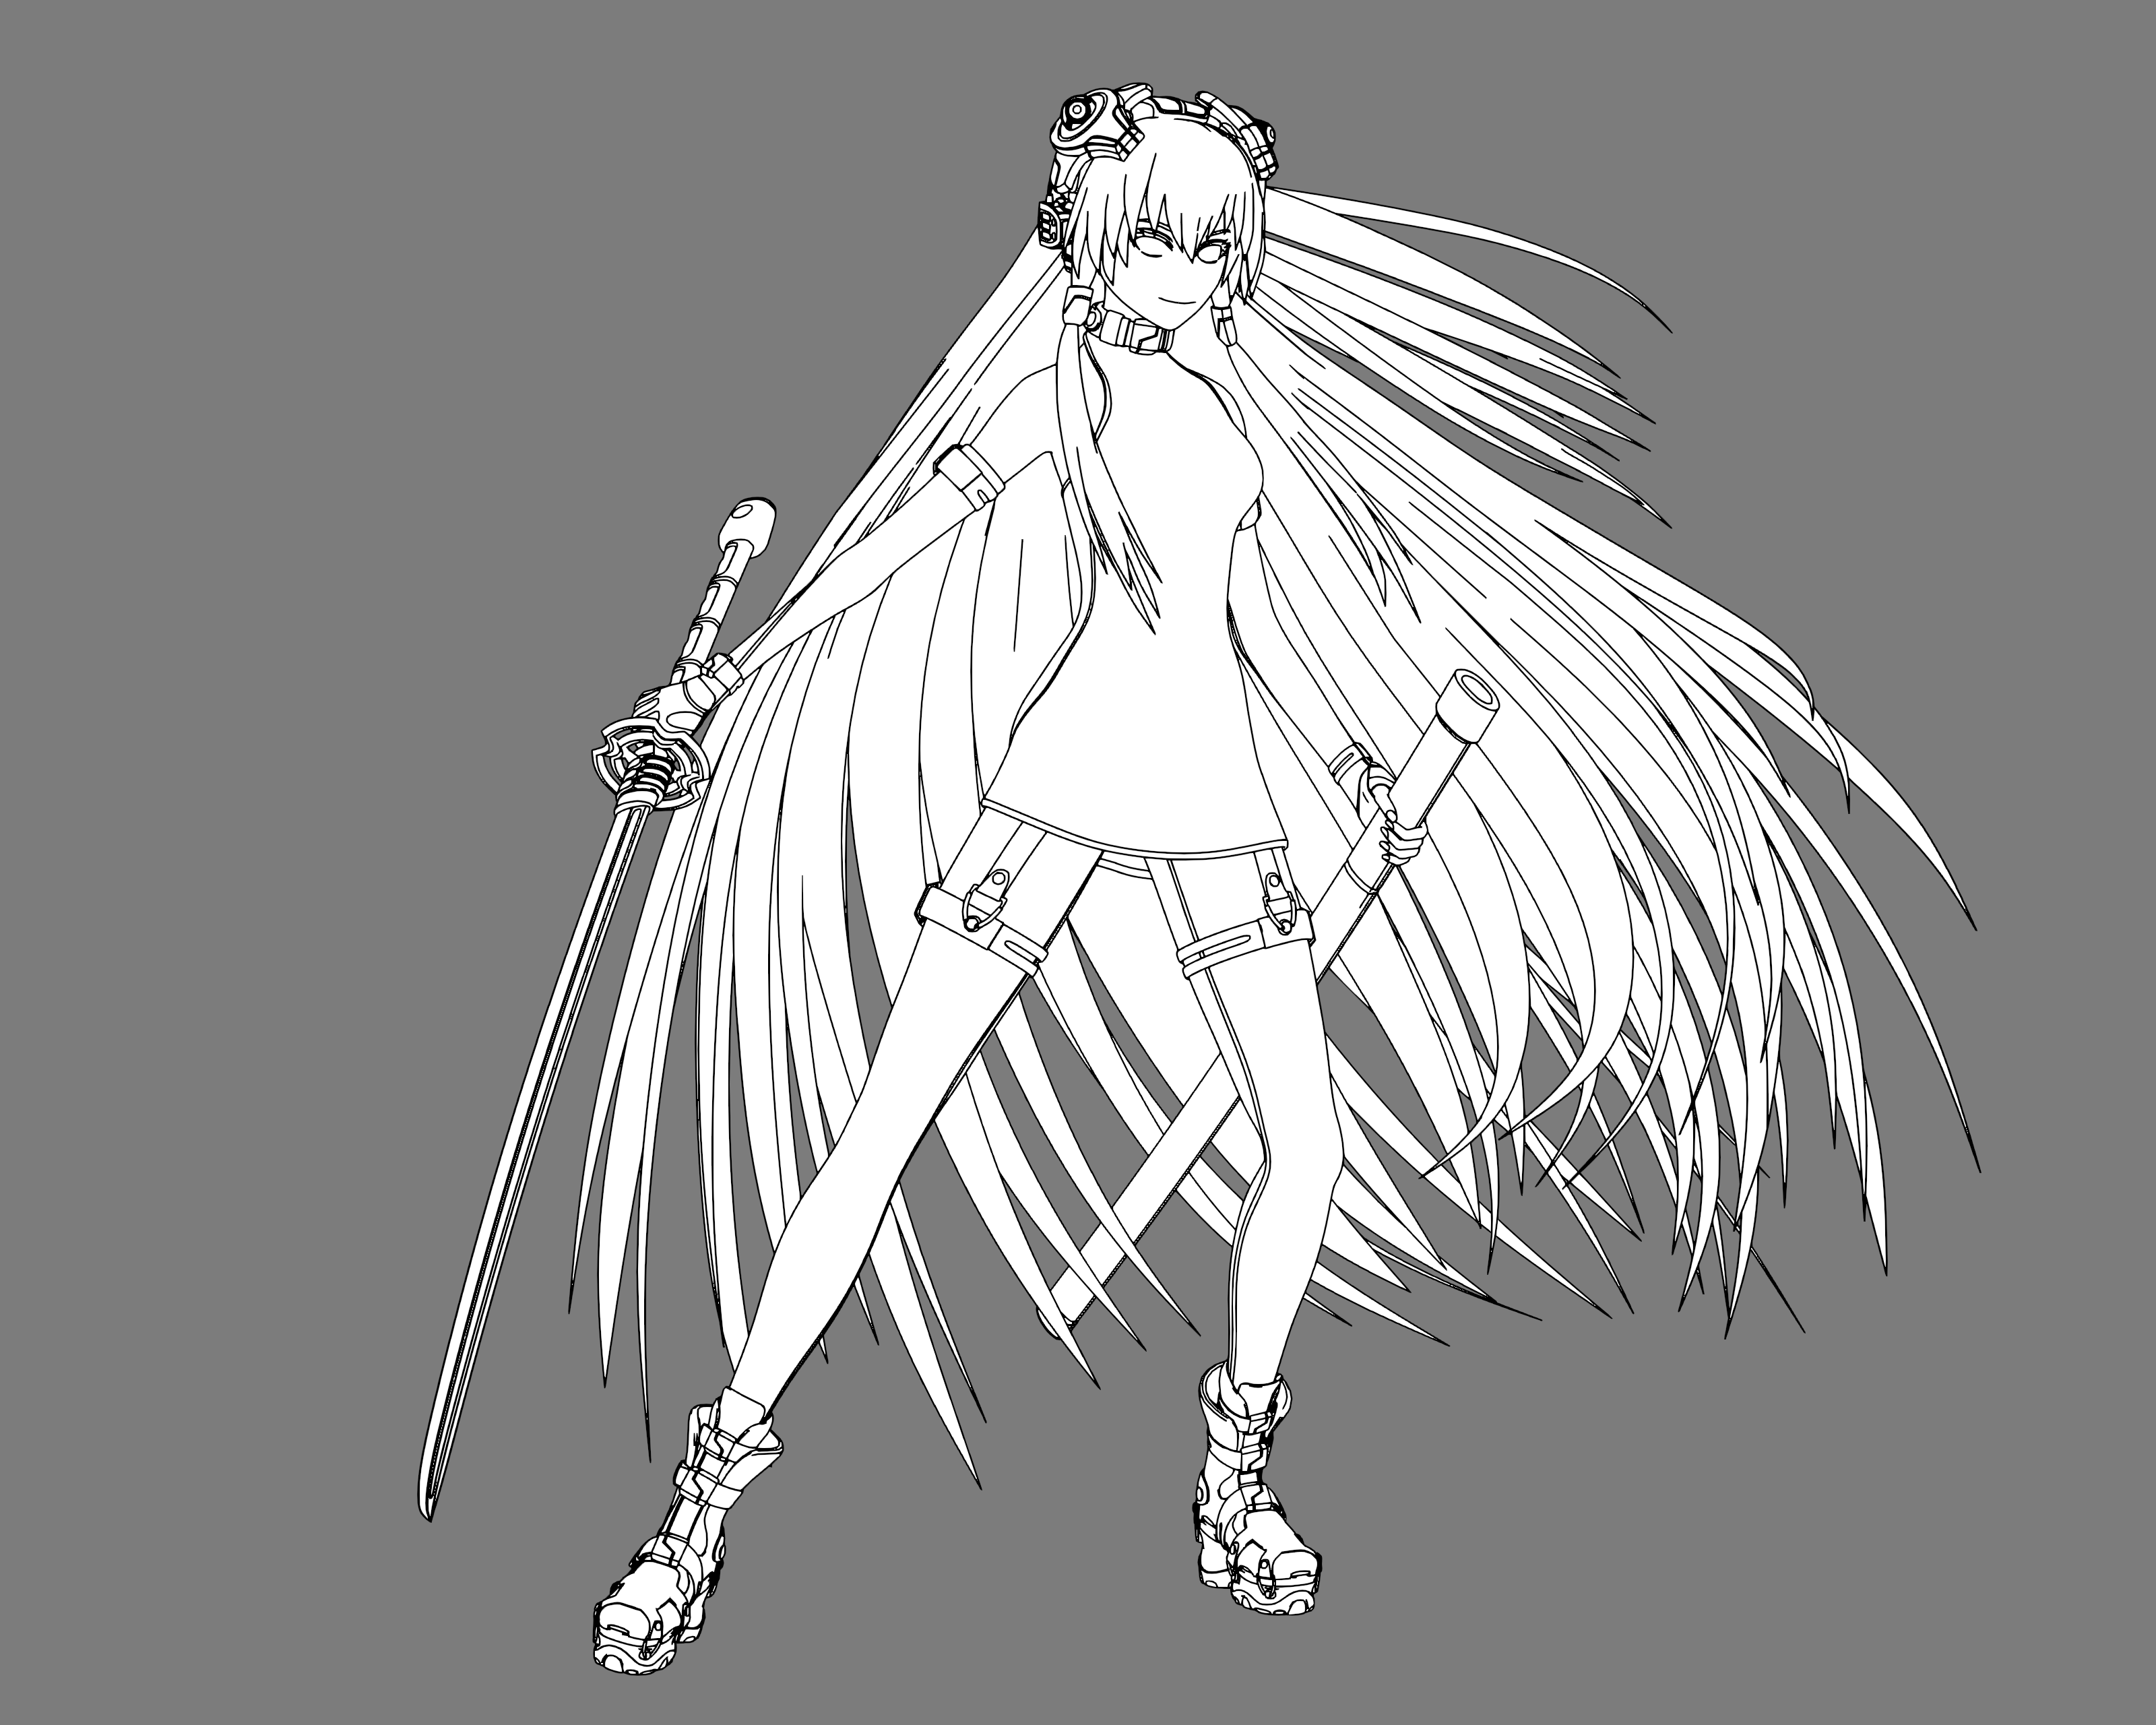
Grease Pencil Line Art. Click for full size.
Conclusion:
That’s all. If you have questions or problems, feel free to leave a comment or contact me anywhere listed on the About page and I will help. If you find more issues, I probably already know about them, and hopefully I can improve them for the next character >_<